Early multihull designer Dick Newick said that “You can have two of three factors in a multihull – speed, comfort, and economy,” but you can’t have all three in the same boat. An 18-year old Privilege 39 was a good compromise for us in terms of these three. Performance was definitely moderate, but the age provided low cost for the amount of boat we were getting, and she was definitely about as comfortable as could be expected for an ocean-going sailboat in the 40-foot range. As our surveyor noted, she had seen a high use-to-maintenance ratio for at least a couple years, if not more; she was a well-equipped, seaworthy platform in need of numerous small repairs and a port engine rebuild.
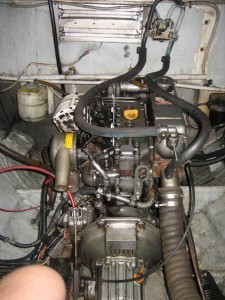
The last five months of repairs would be too much for one blog, so I though I’d start off with a description of the work we’ve done on the engines as part of the preparation for cruising. Both hulls are fitted with 3-cylinder fresh-water cooled Yanmar diesel engines (3GM30F). The starboard engine was new in 1999 and the port engine had undergone minor reconditioning in 1999. Low compression on the port engine during the survey indicated that a rebuild would be prudent, so we pulled the engine in the summer of 2008 on a weekend trip to the boat and left it with Wayne York and Robert at Tradewinds for a rebuild. Wayne and Robert were recommended by several people at the Yacht Basin, and we would heartily recommend them as well. They did great work and were very helpful in answering questions and teaching us several important things about our engines.
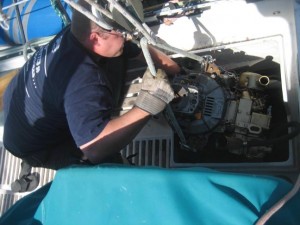
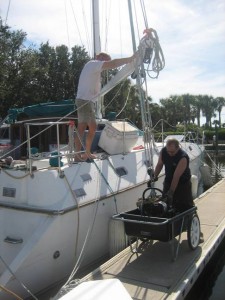
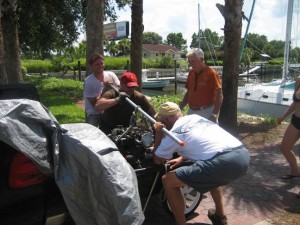
Pulling the engine ourselves could be the topic of a blog or two, but it basically involved disconnecting all the hoses, wiring, and prop shaft, draining the fluids, and then manually working the engine (roughly 350 lbs) up onto blocks of wood and dragging it back to the rear of the engine room, which is like a small L-shaped cave with a vertical entrance. Once the engine was near the rear of the engine room, we rigged a sling through the motor mount brackets and connected the sling to a hoist we’d rigged using the boom and mainsheet blocks. Hoisting the engine was a four-person job, with one person guiding the engine from below, one guiding from above, one person holding the boom in place, and one person slowly winching the engine through the engine room hatch up to the deck. By hoisting the engine up by its aft end, we were able to fit it through the hatch with only inches to spare. Once on deck, we re-rigged the hoist to use the proper engine lift points and swung the engine, hanging from the boom, over to the dock beside the boat where it was lowered into a dock cart and wheeled to the truck. Since our makeshift engine hoist was actually part of the boat’s rigging, we had to lift the engine up into the truck by hand, which is quite a job for two people, but wasn’t too bad once we had some help from a fellow boat owner on the dock. After the engine was rebuilt, we reversed this process until the engine was resting on its mounts again.
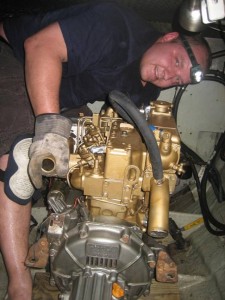
- Dragging & rocking the engine between the mounts & the aft end of the engine room. Wes’s back is against the ceiling of the engine room.
This process was also repeated for the starboard engine which, unknown to us, had been seized by the previous owner on the delivery trip prior to completing the sale of the boat. I wasn’t able to be present at the final sale, and I definitely wouldn’t make that mistake again. The root cause for the seizing of the starboard engine was corrosion in the exhaust mixing elbow, which led to water in the cylinders, especially the #1 cylinder, which Robert spent the better part of a day with a sledge hammer to removing.
In addition to rebuilding both engines, we made several other engine-related upgrades and repairs, including re-building and re-installing both instrument panels — one was inoperable and the other had been after-market installed inside the engine room. We also added temperature sensors to the temperature alarms already present on the panels to give us better feedback on the coolant temperature. Both engines were re-fitted with new A1 fuel line and new Racor 500FG top-loading fuel filters with vacuum pressure gauges to indicate filter status. Intake water hoses were replaced with high-quality intake hose, both mufflers were replaced, and new water strainers were added. For good measure, the port engine was also fitted with a new exhaust mixing elbow. The failed starboard engine starter was replaced, a failed port water pump was replaced, and several wiring improvements were made. To ensure good fuel quality for the trip, both tanks were drained, and the port tank, which seemed to be in worse shape, was cleaned. This was a week or so task that involved cutting access panels into the baffled, stainless tank, cleaning the tank, and then installing custom plates to cover the new access holes.
A fair portion of our preparation time has been spent rebuilding and re-fitting the engines and cleaning the port tank, but we’re hopeful that it will result in reliable engine operation for the duration of the trip. There’s nothing worse than not being able to trust your engine to get you out of a tough situation or tight spot. Hopefully the up-front prep work and the reasonable set of spares we’re taking will keep at least one of them running reliably throughout the trip.


